The Logic Behind Style Templates
mojoPortal content management system as you may have noticed is completely skinnable, you can dramatically change the look of a site by simply changing the skin to one of the more than 30 included skins or a custom skin that you create yourself. The secret of making a site skinnable is to only define styles in the css and not directly in the content. For this reason, the toolbar items for font face, font size, color, and background color have been removed from the WYSIWYG editors included with mojoPortal CMS. Use of these items is contrary to the notion of a skinnable site because these items will hard code font faces, font sizes and colors into your content and these hard coded things will not change when you change the skin so they are not skinnable. If you define colors and font sizes right in your content markup those colors and fonts may not look right when you later decide to use a new skin. You can read more about the issues created by using hard coded style in the FAQ.
However users may complain because they like to be able to set fonts and colors. To empower your users to do such things, as of mojoPortal version 2.3.0.8, you can now define style templates that will allow your users to assign CSS classes to content to style it as they would like. It requires you to define the styles in the CSS files of your skin and then create style templates corresponding to the class names you have defined for the various styles you would like to make available to your users. Style templates show up in the Style dropdown in FCKeditor, CKeditor and TinyMCE. There are a number of system defined styles that appear automatically by default, but you can create custom ones using the Content Style Template tool.
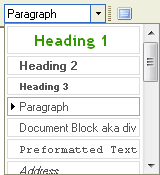
FCKeditor
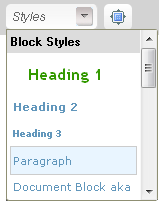
CKeditor
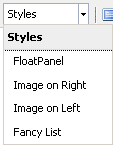
TinyMCE
Where Can I Use Style Templates?
Style Templates can be used in any mojoPortal feature that uses a WYSIWYG editor except the Newsletter. The most likely place you will be using them is the HTML Content Feature.
The Newsletter doesn't allow the use of Style Templates because the style for Newsletters is best contained within the newsletter itself and Style Templates are defined by the CSS file saved on your server.
Creating Content Style Templates
-
Create the CSS classes and rules in the style.css file of your skin or create a new CSS file and include it in the style.config.
-
Go to the Administration Menu by clicking the the Admin Key icon or the Administration link.
-
Click the 'Content Style Templates' link.
-
Click the 'Add New Style' button.
-
Give the Class a friendly name and then assign the element the you want the class to be available for and the name of the class that was used in the CSS file.

-
Click the Save button.
Moving Custom Styles to Top of Style List
The included "system styles" can be placed above or below your own custom ones or removed completely using these Web.config/user.config settings:
<add key="AddSystemStyleTemplatesAboveSiteTemplates" value="true" />
<add key="AddSystemStyleTemplatesBelowSiteTemplates" value="false" />
Set the values for both keys to false to remove the "system styles" completely.
Headings in FCKeditor
If you are using FCKeditor, another point to be aware of is that the included system styles for Heading 1, Heading 2, and Heading 3 are a little misleading because they actually correspond to <h3>, <h4>, and <h5>. The reason for this is because the site title is <h1> and the feature instance title is <h2>, so its natural if you are creating headings below the main header of the feature content it should start with <h3>. But it seems it would confuse some users if we labeled them according to tha actual html elements.
Created by Joe Davis on Jun 17, 2009
Last Modified by Joe Audette on Jun 18, 2012