Create a Windows Azure AppFabric Cache
1. Log on to the Windows Azure Platform Portal, on the lower left side of the page click Service Bus, Access Control & Caching.
2. In the left pane expand AppFabric and click Cache
3. Click the New Namespace button on the toolbar.
4. In the Create a new Service Namespace dialog, verify that the Cache checkbox is selected under Available Services.
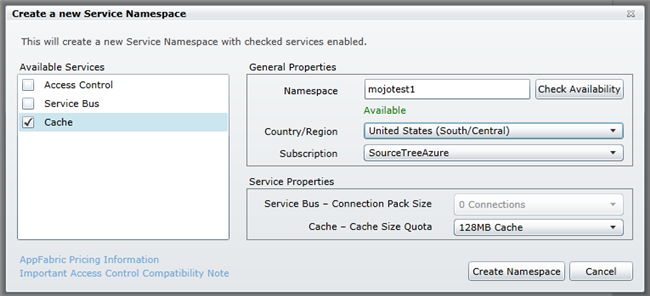
5. Type a proposed namespace in the Choose a Service Namespace text box, and then click the Check Availability button. If the message “Available†appears under the text box, then the namespace name is available, and you can continue.
6. Select a target region in the Country/Region list.
7. Select your target subscription from the Choose a Subscription list.
8. Select a cache size in the Cache Size list. Unless you have a lot of caching going on in custom features you have developed yourself, 128MB should be plenty.
9. Click the Create Namespace button to create the namespace and associated cache. The cache can have a status of Activating for 5-15 minutes before it changes to Active.
See the next step: Preparing a Local Copy of mojoPortal for Deployment
See Also
Created 2011-11-15 by Joe Audette
Updated 2011-11-16 by Joe Audette