Create a Windows Azure Storage Account
1. Log on to  the Windows Azure Platform Portal, and click "New Storage Account" on the ribbon.
2. In the Create a New Storage Account dialog, pick your subscription from the drop down list labeled "Choose a subscription".
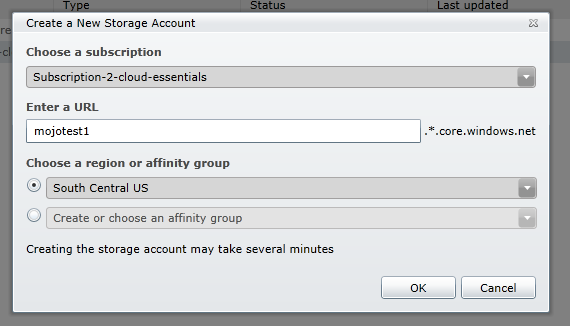
3. Enter a valid name for your storage account in the textbox labeled "Enter a Url".
4. Select a region where the Storage Account will be hosted and click "Create" to register your new storage account. Wait until the account provisioning process completes and updates the Storage Accounts tree view.
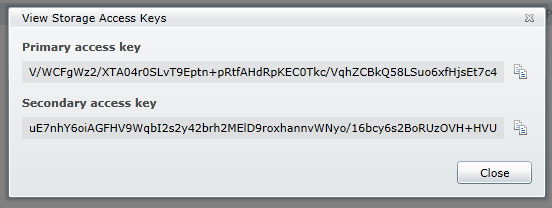
5. Select the newly created storage account and, in the Properties pane, click the View button next to "Primary Access Key". Click the little icon to the right of the Primary Access key to copy it to the clip board.
6. Download the AzureHost release package from codeplex and extract the contents from the .zip file. Note that there are subfolders for ExtraSmall, Small, Medium, Large, and ExtraLarge. Choose the contents of the folder based on the Virtual Machine size you would like to deploy.
7. Edit the ServiceConfiguration.csfg file with a text editor. Replace [ACCOUNTNAME] with the name you entered in the Url when you created your Azure Storage Account (ie mojotest1 in the example above.. Replace [ACCOUNTKEY] with the primary access key from your Azure Storage Account.
<Setting name="DataConnectionString" value="DefaultEndpointsProtocol=https;AccountName=[ACCOUNTNAME];AccountKey=[ACCOUNTKEY]" />
The result should be formatted like this:
<Setting name="DataConnectionString" value="DefaultEndpointsProtocol=https;AccountName=mojotest1;AccountKey=V/WCFgWz2/XTA04r0SLvT9Eptn+pRtfAHdRpKEC0Tkc/VqhZCBkQ58LSuo6xfHjsEt7c4vNcXmVfgdLHcuhFEQ==" />
of course your account name and primary access key will be different than shown here.
See the next step: Deploy AzureHost to Windows Azure
Created 2011-11-08 by Joe Audette
Updated 2011-11-29 by Joe Audette