Notice: The Web Platform Installer was discontinued by Microsoft in December 2022. This article is here for anyone who may be using a custom WPI Feed on an older machine.
Using the Web Platform Installer makes it easy to install mojoPortal content management system and other needed components on your server or local machine. You can only use it when you have direct access to the server or machine where you want to install mojoPortal. If you are using shared hosting see Installation Quick Start. Note that only new installations are supported using the Platform Installer, it is not currently possible to upgrade existing installations using the Platform Installer.
First Install the Web Platform Installer from here:
https://www.microsoft.com/web/platform/
Next launch open IIS 7.x Management Console and click on the web site where you want to install mojoPortal (or you can create a new one as part of the process as shown below), then double click the icon for the Web Platform Installer.
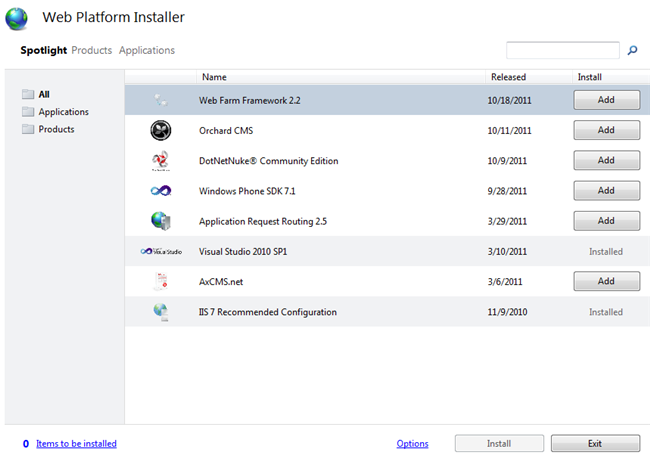
Notice that "Spotlight" is highlighted and mojoPortal is not in the Spotlight list. If you want to install mojoPortal from the Web Application Gallery click "Applications" and then you will see it in the list.
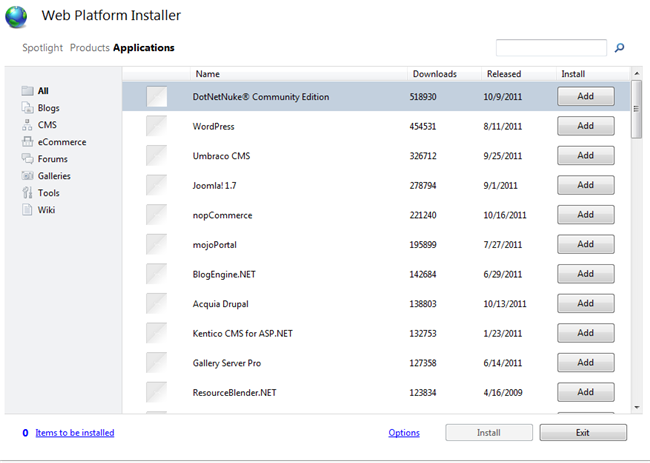
However note that the version of mojoPortal in the Web Application Gallery is usually not updated until a few weeks after a release of mojoPortal and the only available version is the one for MS SQL server. You can always get the latest version of mojoPortal from our custom feed for the Platform Installer.
The Web Platform Installer allows you to add custom feeds to install products, so we have created a custom feed that makes it easier to install mojoPortal packages besides the one we have in the Web Application Gallery.
Adding the mojoPortal Feed to Platform Installer
Click the little link that says "Options", it will open a windows where you can enter a product feed.
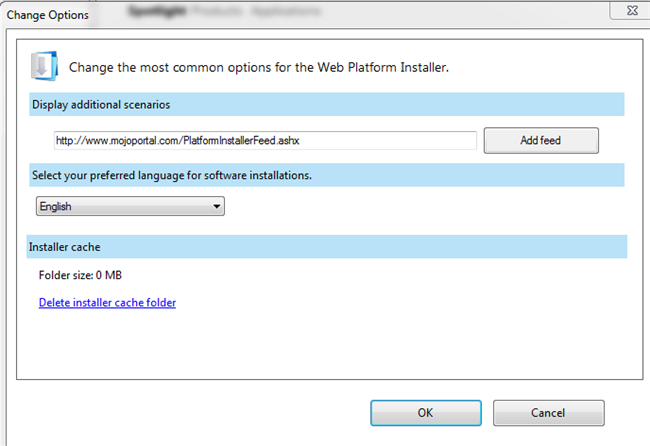
enter http://www.mojoportal.com/PlatformInstallerFeed.ashx as the feed url, then click the Add Feed button then click OK.
Next you will see a mojoPortal link at the top, after the word "Applications", click that link and it will show the available packages of mojoPortal.
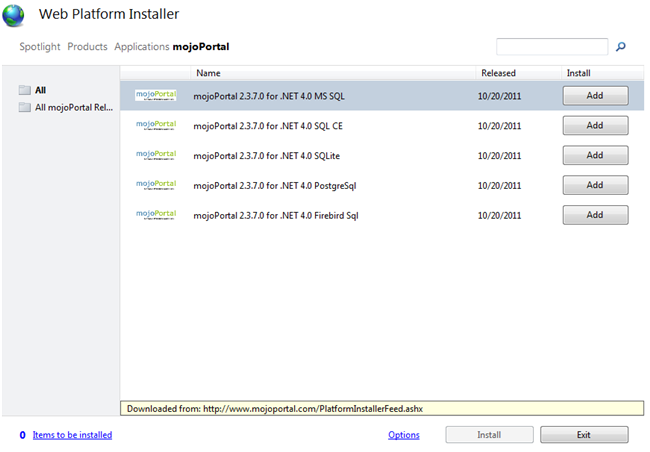
Choose which version you want to install and click Add, then click Install.
Note that the platform installer can install SQL Express if it is not already installed. The SQL CE and SQLite versions are file based databases so there is no extra database software to install. I find SQL CE to be a bit more robust than SQLite and it is possible to migrate to SQL Express/SQL Server later from SQL CE.
If you choose PostgreSql or Firebird Sql, you would have to install those database platforms yourself and manually create the database and set the connection string in user.config.
Installing the mojoPortal package for .NET 4 and MS SQL
If you don't already have SQL Server or SQL Express installed, the Platform Installer should see it as a dependency and install that first. I already have SQL Express installed so I'm not showing those steps. I clicked the Add button next to the mojoPortal package for MS SQL and then clicked Install. Next you are prompted to accept the license.
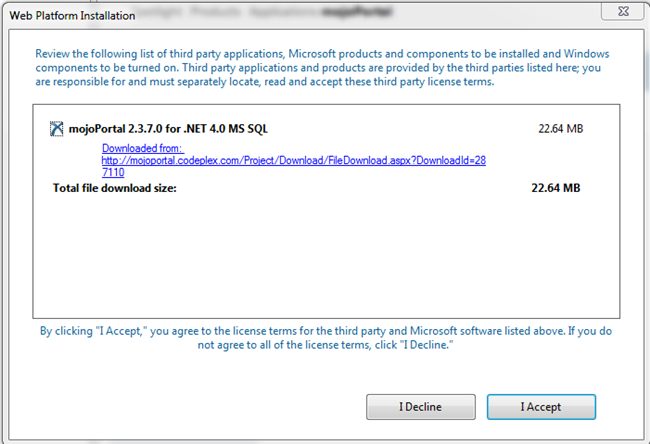
Click the "I Accept" button. It will start downloading and then begin the installation.
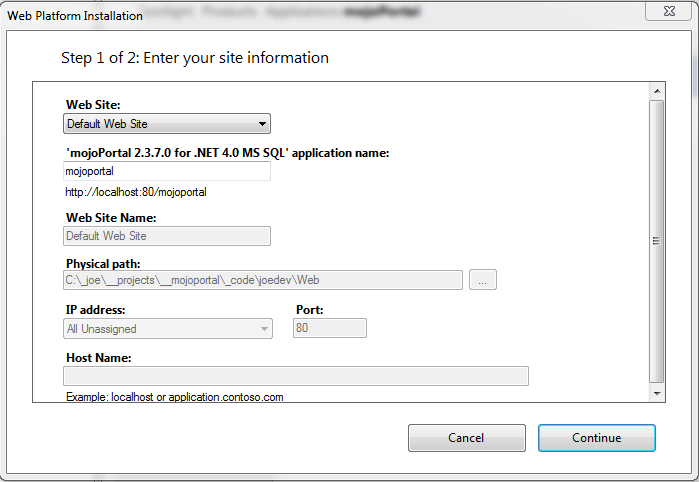
Note that it selected the "Default Web Site" by default, if you've created a new web site to install it in you can choose it from the dropdown list, or you can choose "New Web Site". Note also that by default it populates the "application name" with mojoportal and this means it will install it in a virtual directory named mojoportal below the root of the site. To install it as a root level site just clear out the application name. If you chose "New Web Site" it will clear out the application name as / which means it will install it in the root of a new site.
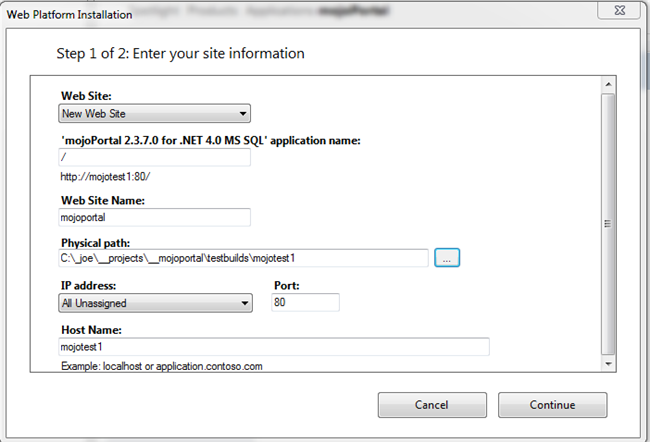
I entered mojotest1 for the host name and added it to my hosts file for local testing, if you are installing on a production server you would put your domain name as the host name. Browse to the folder where you would like to install, it can be anywhere on a local disk drive. Then click "Continue".
Next you'll be prompted for information to create the database. Note that if you used the SQL CE package this step does not exists so it is even easier to install. To use SQL Express or SQL Server you'll need to know the sa user password, sa is the default admin user in SQL Server.
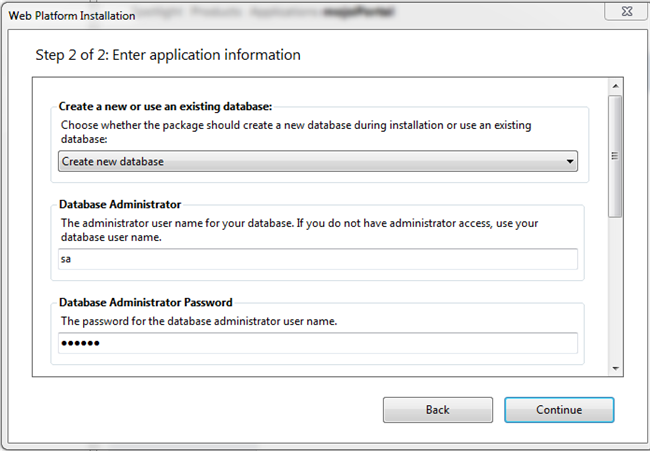
Next scroll down and you'll see we need to specify a database name, a database user name and a password for the new database user. The password must be of at least a certain length, it must have at least on upper case character, one lower case character, one numeric character and one special character or you will get an error here. An example of a password that meets the criteria is $Secret123
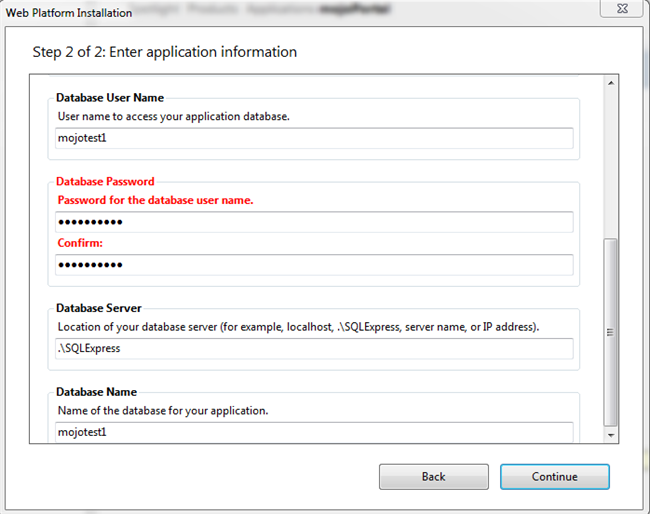
Then click "Continue" and the installation will proceed.
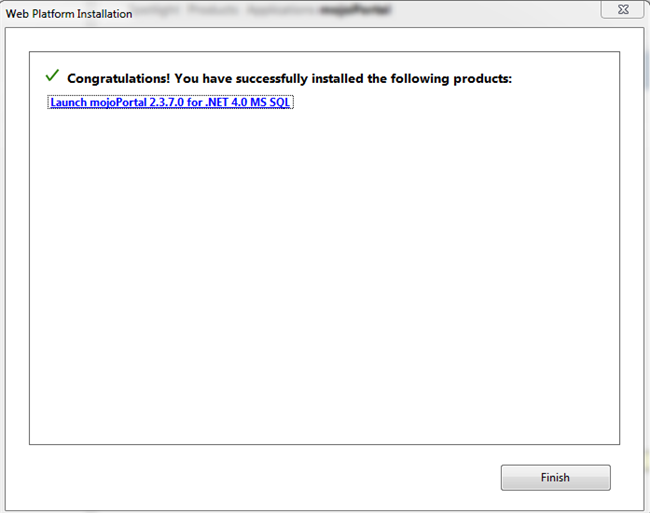
Click the link to launch mojoPortal and it will open the new site in your default web browser. mojoPortal will detect that the database tables don't exist yet and will redirect to its own setup page where it will run all the needed scripts to create the database tables and objects.

Once it completes that you will see a link at the bottom of the setup page to go to the home page of the site.
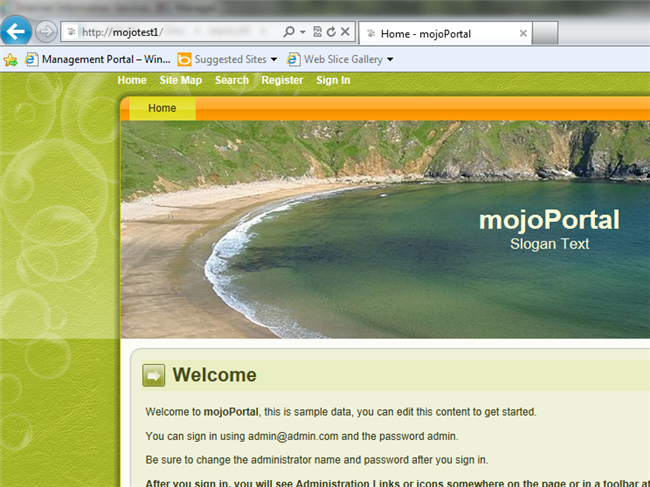
Next you can login using admin@admin.com and the password admin. Of course you should change these credentials afterwards, especially if the site is live on the internet.
Updated 2011-10-26 by Joe Audette