

As of version 2.3.3.9, we have made changes in mojoPortal to make it easy to use Html template designs exported by Artisteer . Artisteer is a great tool that makes it easy for non technical people to create web designs. You don't need to know about html or how to use Photoshop. I highly recommend you get the Standard Edition it has all the features and is really a great value at $129. I did the work to make it possible to use Artisteer designs in mojoPortal because community members requested it and I was so impressed with Artisteer after trying it myself (Joe Audette). I'm no great designer myself, I understand CSS but I'm more of a developer with no great design skills and even I can make attractive mojoPortal skins with Artisteer. I think even for real designers this tool can be useful because you can generate prototype ideas very quickly. Artisteer has a free trial, so please click our ad and give it a try.
If you are interested in purchasing Artisteer, please click one of our ads before you purchase so we can earn a little affiliate revenue, it costs you the same either way, but we can earn up to 25% commission so it is a big help for the mojoPortal project.
Note: The information below is for mojoPortal 2.3.4.1 or higher and Artisteer 2.4 to 2.6
Note: The skins referenced in this article named artisteer24-* are no longer packaged directly with mojoPortal, we now include newer versions named artisteer30-* that are built using Artisteer 3.0. However the artisteer24-* skins are still available, we make a separate download available named extra-skins.zip on our Codeplex download page.
How to make mojoPortal skins using Artisteer 2.4/2.5/2.6
In Artisteer version 2.4, a lot has changed since version 2.3. The CSS classes used in Artisteer 2.4 are now all lower case whereas mixed case CSS classes were used in Artisteer 2.3. Since CSS classes are case sensitive we had to make more changes in mojoPortal to use the new lower case CSS classes in order to support Artisteer 2.4. We did this in a way that doesn't break the previous skins created from Artisteer 2.3 designs, but it means that the skins we used as a starting point for Artisteer 2.3 designs (artisteer-greenlagoon and artisteer-swirly1) cannot be used for Artisteer 2.4 designs. So we had to create a new set of skins that can be used as the starting point for HTML templates exported from Artisteer 2.4.
The biggest new feature in Artisteer 2.4 is that they now have vertical navigation menus whereas in 2.3 only horizontal menus were supported. The new vertical menus in Artisteer 2.4 are not quite what I expected, I had envisioned that they would add a flyout vertical menu much like they have a flyout horizontal menu, so you would choose either a horizontal menu design or a vertical one. But instead, it seems the designs generated by Artisteer 2.4 usually have both a horizontal menu and a vertical menu, and the vertical menu is redundant in that it has the same links as the main horizontal menu. It is however possible to make a design with only a vertical menu, but the vertical menu doesn't seem as suited for the main navigation as the horizontal menu. In order to provide a lot of flexibility, I made it possible to use the vertical menu by itself as a main menu, as a duplicate of the horizonal menu, or as a sub menu for the horizontal menu in which case it is only visible when a top level page in the horizontal menu has child pages.
Here are the quick steps to get you going:
-
Create a new folder for your skin at /Data/Sites/1/skins/artisteer-whateveryounameit. Note that 1 is the site id and your site id may be different in a multi site installation.
-
Notice that pretty much all of the Artisteer 2.4 templates fit into one of these categories, and depending on the category is how you choose which existing mojoPortal skin to use as your starting point.
1. Horizontal menu at the very top of the page with no vertical menu - use artisteer-24topmenu
2. Horizontal menu at the bottom of the page header with no vertical menu - use artisteer-24headermenu
3. Horizontal menu at the very top and a vertical menu - use artisteer-24verticalmeu2
4. Horizontal menu at bottom of page header and a vertical menu - use artisteer-24verticalmenu1
5. Vertical menu only - use artisteer-24verticalmenu3
-
Copy the contents of the appropriate existing skin selected from above (except the images sub folder)
-
Paste the content into your new skin folder.
-
Now the Artisteer html template consists of the files shown in this image:
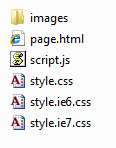
copy all of those into your new skin folder, it will overwrite a couple of files. page.html is not really required but you can use it to compare the original design to your skin.
-
You are 90% done. If your design has a different width than the included ones, you may need to tweak the width for columns in style-artisteer-overrides.css to adjust for difference in the width of your design.
.art-contentLayout .art-sidebar2 {} is right column
-
Generally, you will want the WYSIWYG editor windows to be styled as black text on a white background. However, the Artisteer export places color, background-color, and background-image in the body {} selector in style.css, which causes them to be applied to both the site and editor. To fix the editor, create overrides in style-artisteer-overrides.css like this:
body{color: black; background-color: white; background-image: none; }, then copy the corresponding Artisteer body{} styles from style.css into the body.pagebody{} selector in style-artisteer-overrides.css.
-
Since mojoPortal uses h2 for all module titles and Artisteer does not use headings for side bar titles, you need to grab the font, colors, and margins from the style.css in the selector for .art-blockheader .t {} and copy them into the style-artisteer-overrides.css in the selector for .art-blockheader .t h2.moduletitle {} to style our h2 elements the same as Artisteer.
-
Because Artisteer uses various div structures for background images, you may need to compare the html of your template to the layout.master file of the skin and replace those divs with the ones appropriate for your design. These are easy to find since they are the very first divs near the top of layout.master and just below the ScriptManager element. An example is like this:
<div id="art-page-background-simple-gradient">
<div id="art-page-background-gradient"></div>
</div>
you may need to replace that with the variation from your design, for example some designs have this instead:
<div id="art-page-background-simple-gradient"></div>
<div id="art-page-background-glare"><div id="art-page-background-glare-image"></div></div>
<div id="art-page-background-gradient"></div>
-
and other variations are probably also possible
-
You may need to tweak little things in the stylemojo.css file
-
Depending on your color scheme you may also need to customize various feature css files like styleaspcalander.css, styledatacalendar.css, styleblog.css and so on. You can typically copy these files from another skin with a similar color scheme.
-
You may want to change the jQueryUI theme to find the best one to go with your design.
-
For Artisteer 2.5, see additional notes on this forum thread.
Tips for Working with Artisteer
-
Note that Artisteer templates typically allow layout of 1 or 2 or 3 columns. In mojoPortal our skins support automatic adjustment from 1 to 3 columns depending on where you place features on a page. To make sure your Artisteer template has the needed CSS ingredients to support from 1 to 3 columns, I recommend you always use a 3 column layout in Artisteer with a left column and a wide center section.
-
All the included skins for Artisteer start with a 1000px wide sheet which I think is a good width for modern screen resolutions. If you make a design wider or narrower you may need to adjust widths in style-artisteer-overrides.css. It might be easier if you use the same sheet width, but it should also work fine with different sheet widths because Artisteer 2.4 now uses percents for column widths. A design based on a 1000px wide sheet does have a slight horizontal scroll at 1024x768 resolution so if a lot of your visitors have that resolution you may want to use a 960px sheet instead.
-
All the included artisteer skins use a 30px top offset for the sheet which leaves room for our top nav menu with sign in, register, site map links etc. You may want to use the same approach.
-
When designing in Artisteer keep in mind that if you make the side column too narrow it will be difficult to fit features there without crowding.
That should do it. Let us know in the forums if you run into issues, since we have only tested a few designs it is possible we still need to refine our support for Artisteer here and there.
Important Notes For Medium Trust Hosting
In mojoPortal we use a custom VirtualPathProvider to map the location of the theme.skin file to the skin folder. Unfortunately VirtualPathProviders do not work in Medium Trust, therefore in Medium Trust it will always use App_Themes/default/theme.skin for the theme.skin file but it will use the rest of the files from the skin folder. The reason this matters is that we use the theme.skin file so set several properties that tell mojoPortal how to add the needed extra markup for Artisteer. Also since the CSS classes changed to lower case in Artisteer 2.4, we need different settigns there for Artisteer 2.4 as compared to Artisteer 2.3.
These are needed to be set as false to prevent extra corner rounding divs from rendering that are not used by Artisteer, these are used in other non-Artisteer skins for corner rounding.
<mp:CornerRounderTop runat="server" DoRounding="false" />
<mp:CornerRounderBottom runat="server" DoRounding="false" />
These are needed for Artisteer 2.4, for Artisteer 2.3, it needs UseLowerCaseArtisteerClasses as false.
<portal:mojoPanel runat="server" RenderArtisteer="true" UseLowerCaseArtisteerClasses="true" />
<portal:ModuleTitleControl runat="server" RenderArtisteer="true" UseLowerCaseArtisteerClasses="true" />
<portal:mojoButton runat="server" RenderArtisteer="true" CssClass="art-button" />
So as long as you are only running a single site in the medium trust installation, you can just copy the theme.skin file from the skin folder into App_Themes/default folder.
However, for a multi site installation it can be a problem unless all sites use skins that need the same settings. Like if one site want to use an Artisteer 2.3 skin and another site in the same installation wants to use an Artisteer 2.4 skin it will not work since only one theme.skin is available for all sites.
Last Updated 2010-08-17 by Joe Audette